Arcadia Wood Flooring handles wood floor refinishing in Arcadia, CA, serving surrounding cities including Mayflower Village, North El Monte, East Pasadena, South Monrovia Island and Temple City. With more than 20 years spent sanding and coating hardwood, we treat refinishing as a series of decisions made in order rather than a single machine pass across the room. Each of those decisions shows up in writing before a sander is unloaded.
The first checks happen before any quote is final. We confirm when the house was built, because pre-1978 paint and finish layers change how the work has to be done, and on engineered floors we measure the wear layer so we never promise a sanding the veneer cannot survive. On solid oak strip and parquet, we look at how much wood remains above the tongue.
Finish choice is local too. Products applied in the South Coast air district must stay within a wood coatings limit of 275 grams per liter, so our finish lineup comes from what is legal here, not from a national catalog. The result is a floor that looks right, lasts, and was coated with a product that belongs on it.
Deciding How Much Refinishing A Floor Needs
Screen And Recoat For Worn But Intact Finish
When a floor looks dull and scuffed but the finish still covers the wood everywhere, a screen and recoat is often enough. The existing coat is abraded so a fresh layer bonds to it, and the floor is back in use quickly.
This only works over a clean surface. Floors cleaned for years with wax or oil soap products can reject a new coat, so we test adhesion in a hidden spot before committing to a recoat.
Full Sand For Bare Wood And Stains
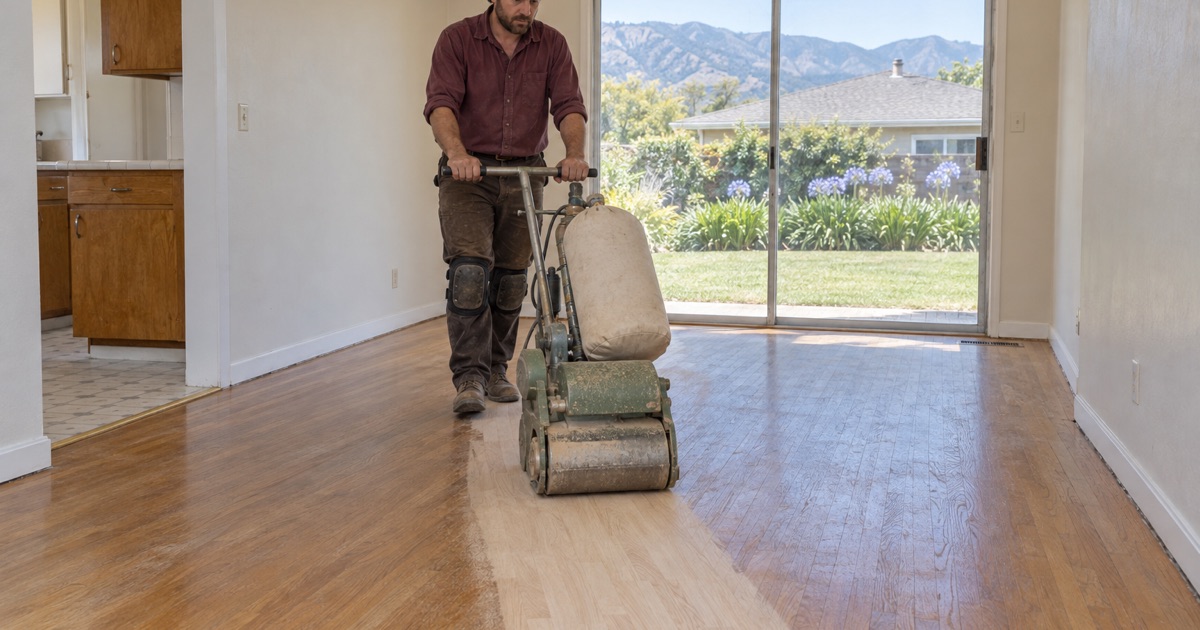
Once traffic lanes show gray or bare wood, or stains and deep scratches cut into the boards, only sanding reaches them. A full sand removes old finish and stain entirely and gives a clean base for new color and coats.
We tell you up front if boards need replacement first. Black water stain and deep pet damage usually sit too far into the wood to sand out, and replacing those boards before sanding lets the new wood be leveled with the rest of the floor.
Remaining Wood And Engineered Veneers
Solid strip flooring can typically be sanded several times, but each pass takes wood off. We check thickness at a register or threshold before recommending a full sand on an older floor.
Engineered hardwood depends on wear layer thickness. A thick veneer may handle a sanding, while a thin one can only be screened and recoated, and sanding through it exposes the core, which cannot be hidden.
Refinishing Older Oak Strip And Parquet
Lead-Safe Sanding In Pre-1978 Houses
Most Arcadia housing predates 1980, and in houses built before 1978 the EPA Renovation, Repair and Painting Rule governs work that disturbs painted surfaces. Sanding edges along painted baseboards and shoe molding can fall under it.
We confirm build year during the estimate and plan containment, cleanup and molding removal around the answer. Finding out after sanding has started is the outcome we set out to avoid.
Loose Tiles And Adhesive Before Parquet Sanding
Parquet tiles that have lost their bond will rattle or tear out under a drum sander. We tap-test the floor, reset loose tiles and match any missing pieces before sanding begins.
Where tiles are lifting, we look at the adhesive underneath first. Black mastic and cutback adhesive are identified before tiles come up, rather than scraped and sanded on a guess.
Keeping Or Changing Honey Oak Tones
Many older floors carry the amber color of decades of oil-based finish. Sanding to bare wood lets you keep that warmth with an oil-modified coat or move lighter with a clear waterborne polyurethane and, if wanted, a stain.
Oak that has aged for decades rarely returns to the pale color of new boards. Sample patches on your own floor show what is realistic before the full room is committed.
Finish Systems We Apply
Waterborne Polyurethane
Waterborne finish dries clear, stays light on pale woods, and allows more coats in a day than slower products. It is often our first suggestion when a household needs rooms back quickly or wants to avoid ambering.
Quality varies widely between waterborne products. We use systems with a proper sanding sealer and enough coats to build real protection rather than a thin, fast film.
Oil-Modified Polyurethane And Hardwax Oil
Oil-modified polyurethane gives warm, amber color and a durable film but needs longer cure time between coats. Hardwax oil penetrates the wood, gives a lower sheen, and can be touched up in a worn spot without recoating the room.
Every option we offer meets the South Coast VOC limit. We compare durability, maintenance and sheen level for your household before choosing.
Sheen Level And Stain Choices
Satin and matte sheens hide scratches and dust better than gloss, which shows every mark in bright rooms. Stain can shift color, but darker stains highlight dust and wear in busy houses.
We lay stain samples on sanded wood from your own floor. The same product can look different on red oak, white oak and fir, so testing in place avoids surprises.
Our Step-by-Step Wood Floor Refinishing Process
Step 1: Inspection And Written Scope
We check build year, moisture, finish history, board condition and wear layer, then write the scope, finish and schedule. Repairs, stairs and any molding work are listed separately so the price is easy to read. If the inspection turns up something that changes the plan, such as a soft spot in the subfloor or active termite frass, it goes into the scope with photos before you approve anything.
Step 2: Repairs And Protection
Damaged boards are replaced, loose parquet is reset, and nail pops are addressed. Doorways, vents and cabinets are covered and dust containment goes up before sanding. Shoe molding or quarter round is pulled where the edger needs to reach the wall, and each piece is marked so it goes back in the same place.
Step 3: Sanding Through The Grits
The drum sander, edger and orbital sander work through each abrasive grit in order. We check under raking light for chatter marks, edger swirl and missed spots before moving on. Skipping a grit saves an hour and costs the floor, because the scratches it leaves behind only show up once stain or finish is on.
Step 4: Stain, Sealer And Finish Coats
The floor is vacuumed and tacked, then stain and sealer are applied, followed by finish coats within each product’s recoat window. Coat timing is adjusted for humidity and temperature. Between coats the surface is lightly abraded and cleaned again, so each layer bonds and dust nibs do not get trapped in the final coat.
Step 5: Cure Time And Walkthrough
We walk the floor with you, review cure times, and hand over care instructions. The room-by-room schedule shows when furniture, rugs and normal daily use can return. Felt pads for chair and table legs are worth adding before anything is moved back, since fresh finish is at its softest in the first weeks.
- 20+ Years on Wood Floors
- Room-by-Room Schedules
- Stairs Priced by the Step